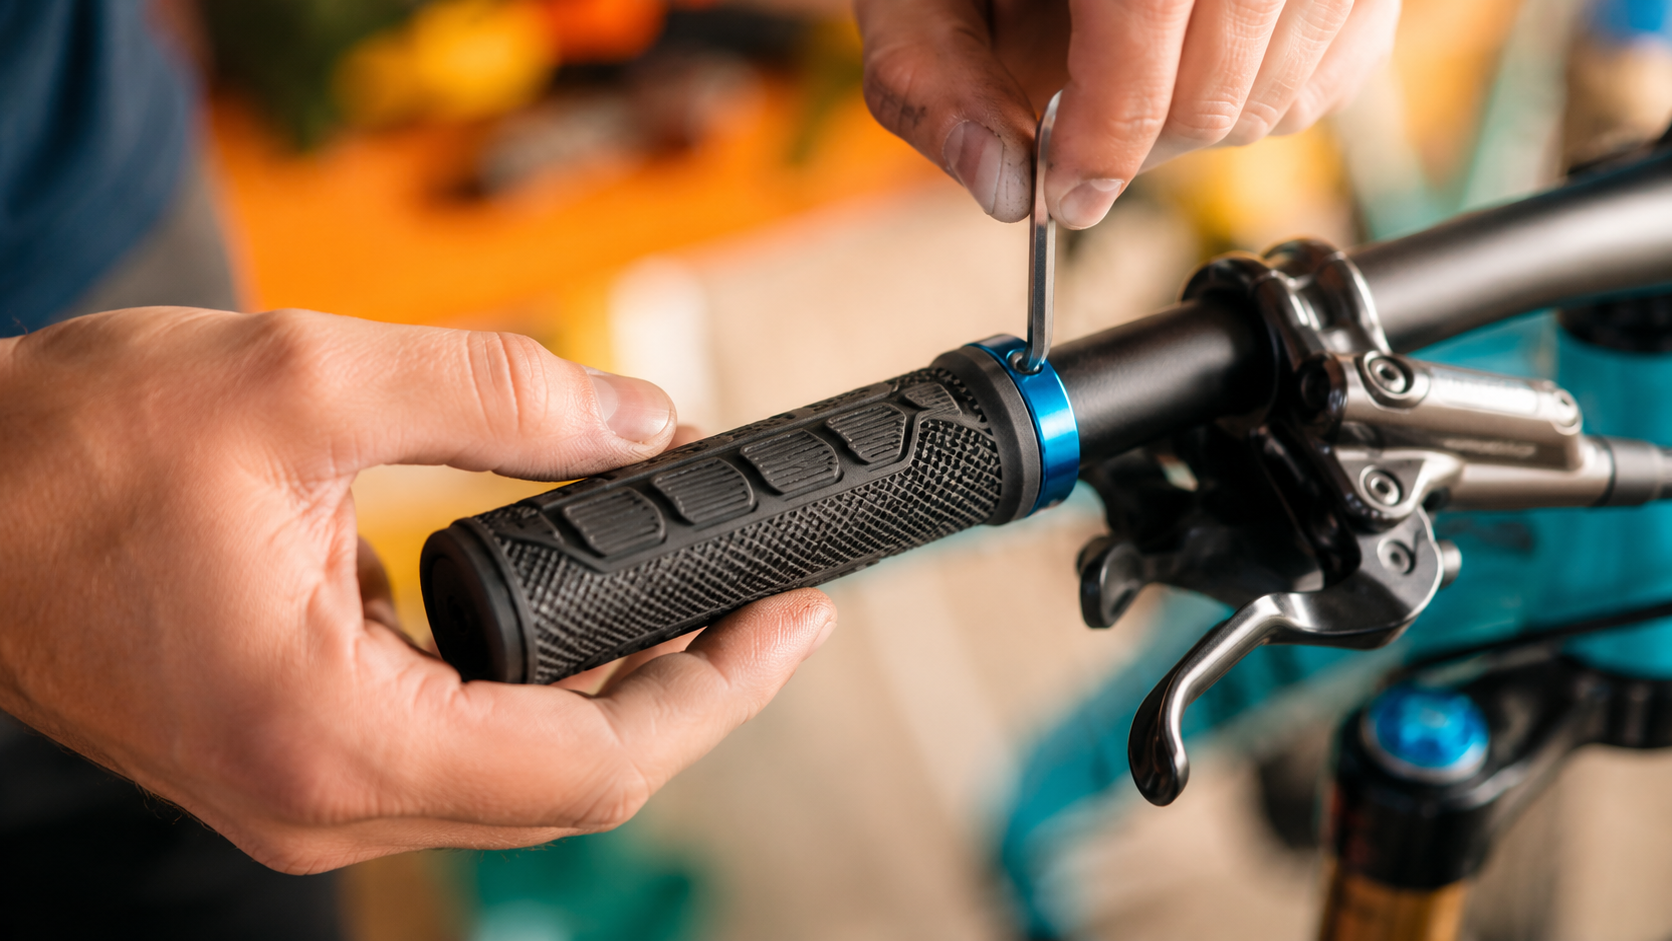
If your hands slide around on the bar every time the road gets bumpy, or your grips spin loose the moment you stand up on the pedals, you don’t need a new bike — you need new grips. It’s a five-minute job once you know the trick, and you don’t need a shop visit or a special tool kit to get it done right.
This guide covers exactly how to install bike hand grips whether you’ve got the modern lock-on style with a clamp collar, or the older slip-on rubber style that just stretches onto the bar. Both take under 15 minutes, and both are genuinely beginner-friendly.
Quick Answer: To install bike hand grips, remove the old grips with a flathead screwdriver and a squirt of degreaser, clean the bar, then slide the new grips on. For lock-on grips, tighten the small clamp bolts with a hex key. For slip-on grips, spray a little rubbing alcohol or hairspray inside the grip first so it slides on easily and locks in place as it dries.
In this guide:
- Signs You Need New Grips
- Choosing a Grip Material
- Tools You’ll Need
- Removing the Old Grips
- Installing Lock-On Grips
- Installing Slip-On Grips
- Practical Tips
- Common Mistakes
- FAQ
- Final Thoughts
Signs You Need New Bike Hand Grips
Grips wear out quietly — most riders don’t notice until their hands start complaining. A few clear signs it’s time to install bike hand grips that are new:
- They spin on the bar. If a grip twists under your hand when you’re steering, the rubber has stretched out or the lock-on collar has loosened for good.
- The surface is smooth or cracked. Rubber hardens and cracks with age and UV exposure, which means less cushioning and less traction, especially in the rain.
- Your hands go numb on longer rides. Worn-out padding transmits more road vibration straight into your palms.
- They’re just old. If you bought the bike used or don’t remember the last time you swapped them, it’s worth a fresh set — grips are one of the cheapest upgrades on any bike.
Which Grip Material Should You Choose?
Before you install bike hand grips, it’s worth thinking about what they’re made of — not just how they look. Material affects comfort, grip in the wet, and how long they’ll actually last.
| Material | Feel | Best For | Watch Out For |
|---|---|---|---|
| Rubber | Firm, durable, reliable in the wet | Commuters, all-around riders | Can feel harsh on long, rough rides |
| Foam | Soft, lightweight, absorbs vibration well | XC and road riders who want to save weight | Wears out faster, less durable long-term |
| Gel / Silicone | Plush cushioning, great vibration damping | Riders with hand fatigue, numbness, or long endurance rides | Bulkier feel, sometimes less precise bar control |
If you’re not sure which one to pick, rubber is the safest all-around choice — it’s what most bikes ship with, and it holds up well across seasons and weather. Once you know how to install bike hand grips, swapping materials later to try something softer or lighter is just as easy as this first swap.
Tools You’ll Need Before You Install Bike Hand Grips
Nothing exotic here. Most of it is stuff you already have lying around the garage.
| Tool / Material | Why You Need It |
|---|---|
| Flathead screwdriver | Prying up the old grip to break the seal |
| Hex (Allen) key set | Loosening and tightening lock-on collar bolts |
| Rubbing alcohol, hairspray, or soapy water | Lubricates slip-on grips so they slide into place, then dries tacky |
| Clean rag | Wiping the bar clean before the new grips go on |
| New grips | Matched to your bar diameter (usually 22.2 mm) and to your hand size |
Removing the Old Grips First
Before you can install bike hand grips, the old ones have to come off — and they’re usually more stubborn than people expect.
- Slide the tip of a flathead screwdriver between the grip and the bar, near the outer edge.
- Spray a small shot of degreaser, rubbing alcohol, or even water down into that gap. This breaks the suction holding the grip in place.
- Twist the grip back and forth while pulling outward. It should slide off with a bit of persistence. If it’s really stuck, a slow, careful cut down the length of the grip with a utility knife works — since you’re replacing it anyway, there’s no need to save it.
- Wipe the bar down completely once the old grip is off, so no old adhesive or grime is left behind.
How to Install Bike Hand Grips: Lock-On Method
Lock-on grips are the standard on most modern mountain and hybrid bikes. They use a metal clamp collar instead of relying on friction, so they stay put even when your hands are sweaty. For a deeper technical breakdown of both styles, Park Tool’s official grip installation guide is a great reference if you run into anything unusual with your specific bar or collar design.
Step 1: Loosen the Collar Bolts
Use your hex key to back off the small bolt (or bolts) on the clamp collar so the grip can slide freely.
Step 2: Slide the Grip On
Push the grip onto the clean, dry bar until it’s fully seated against the brake lever or shifter. No lubricant needed here — that’s the advantage of the lock-on design.
Step 3: Tighten the Collar
Snug the bolt down with the hex key until it’s firm. You don’t need to overtighten — “snug plus a small turn” is the general rule most mechanics use. Overtightening can crack the collar or the grip itself.
Step 4: Give It a Twist Test
Grab the grip and try to twist it by hand. If it doesn’t move at all, you’re done. If there’s any play, tighten a touch more.
How to Install Bike Hand Grips: Slip-On Method
Slip-on grips rely purely on a tight friction fit, which means installation is a little more hands-on, but still simple once you know the trick.
Step 1: Choose Your Lubricant
Rubbing alcohol, a light spray of hairspray, or even plain soapy water all work. Hairspray has the advantage of drying tacky, which helps the grip bond to the bar as it sets.
Step 2: Spray Inside the Grip
Spray a small amount directly into the open end of the grip, not onto the bar. This keeps things less messy and puts the lubricant exactly where it’s needed.
Step 3: Twist and Push
Work the grip onto the bar with a twisting, pushing motion rather than a straight pull — this spreads the lubricant evenly and reduces the chance of tearing the rubber.
Step 4: Let It Dry
Give the grip 10–15 minutes (longer if you used hairspray) before riding, so it has time to set and bond to the bar surface.
If you’re also swapping other contact points on the bike at the same time, it’s worth checking whether your cycling gloves are still doing their job — grips and gloves work together to cut down on hand fatigue and vibration.
Practical Tips for a Secure, Comfortable Fit
- Match the diameter. Most bikes use a standard 22.2 mm bar, but always check before ordering — a grip that’s too loose will never feel secure no matter how you install it.
- Line up the pattern. If your grips have a directional texture or logo, dry-fit them first to make sure they’ll sit the right way once pushed fully into place.
- Don’t skip the bar-end plugs. These aren’t just cosmetic — an open handlebar end is a real safety hazard in a fall. Press them back in by hand or gently tap them with a mallet.
- Test ride on a short, flat stretch first. Before committing to a longer ride, take a quick spin to confirm nothing spins or shifts under load.
- Consider grip width and diameter, not just material. Riders with smaller hands often do better with a slimmer grip profile, while riders who battle numbness may prefer a slightly larger, more cushioned option.
- Keep the old grips until you’re sure. If you’re trying a new material or shape for the first time, hold onto the old set for a week or two in case you want to switch back.
Common Mistakes to Avoid
- Using regular oil or grease as a lubricant. It never fully dries, so slip-on grips stay loose indefinitely. Stick to alcohol, hairspray, or soapy water.
- Overtightening lock-on collars. This is a small fastener — cranking it down hard can crack the collar or split the grip.
- Forgetting to clean the bar first. Leftover grime or old adhesive stops new grips from seating fully and evenly.
- Skipping the bar-end plugs. A minor detail with a real safety impact.
- Buying the wrong diameter. Always double check your bar size before you order new grips online.
Frequently Asked Questions
Do all bike grips fit all bikes?
Not quite. Grips need to match your handlebar’s diameter — most road and mountain bikes use a 22.2 mm standard, but always check your bar’s spec before buying.
How do I know what size bike grips to get?
Measure the exposed part of your current grips or the bare handlebar with a tape measure or calipers. Most brands list the required bar diameter directly on the packaging.
Can you replace handlebar grips on a bike yourself?
Yes — it’s one of the easiest home bike repairs. Both lock-on and slip-on styles can be swapped in under 15 minutes with basic tools.
What household items work instead of a grip installation spray?
Rubbing alcohol, hairspray, and soapy water are the three most common substitutes, and all three work well for slip-on grips.
Do I need to remove the brake levers to install bike hand grips?
No. You only need to slide the grip up against the existing lever or shifter clamp — there’s no need to loosen or remove your brake levers for a standard grip swap.
Is rubber, foam, or gel better for bike grips?
It depends on your riding style. Rubber is the most durable and weather-resistant, foam is the lightest and best for saving weight, and gel or silicone gives the most cushioning for riders dealing with hand fatigue or numbness.
Final Thoughts
Once you’ve done it, you’ll wonder why you ever thought this was a job for the shop. Now that you know how to install bike hand grips the right way — whether you’re working with a lock-on collar or an old-school slip-on grip — you can keep your hands comfortable and your bike feeling fresh for the cost of a ten-dollar part and fifteen minutes of your time.
Ready to upgrade your grips? Check out our picks for comfortable, budget-friendly grips and other contact-point upgrades below, and don’t forget to bookmark our step-by-step flat tire guide for the next time your bike needs a quick fix on the road.
