Your bike chain is one of the hardest-working components on your bicycle. Every time you pedal, the chain transfers your power to the rear wheel while constantly moving through the chainrings, cassette and derailleur pulleys. Dirt, dust, old lubricant, water and road grime can all increase friction and accelerate drivetrain wear.
Learning how to clean and lubricate your bike chain properly is one of the simplest maintenance skills any cyclist can learn. A few minutes of regular chain care can help your drivetrain run more quietly, shift more smoothly and last longer.
The good news is that you don’t need an expensive workshop or complicated equipment. With a few basic supplies and the correct technique, you can clean and lubricate your bicycle chain at home.
Why Should You Clean Your Bike Chain?
A dirty chain does more than make your bicycle look neglected. Road grit, dust and old lubricant can accumulate around the rollers and other moving surfaces of the drivetrain. That contamination can increase friction and contribute to premature wear.
Regular cleaning removes abrasive contamination before you add fresh lubricant. This is important because applying new lube over a heavily contaminated chain can create an even stickier mixture that attracts additional dirt.
A clean and correctly lubricated chain can also make your drivetrain feel smoother and quieter. Keeping the chain clean helps protect other expensive components, including the cassette and chainrings.
BikeRadar recommends regular chain cleaning and explains that properly cleaning and lubricating the chain can help reduce wear and extend the life of drivetrain components.
Read BikeRadar’s chain-cleaning guide
How Do You Know Your Chain Needs Cleaning?
You don’t need to wait until your chain is completely covered in black grime before cleaning it. There are several simple signs that it’s time for maintenance.
- The chain looks visibly dirty or greasy.
- Your fingers become black after touching the chain.
- The drivetrain sounds louder than usual.
- Shifting feels less smooth.
- The chain has been ridden through rain, mud or dusty conditions.
- Fresh lubricant becomes contaminated almost immediately.
- You notice surface rust or corrosion.
REI’s chain-care guide also notes that a black, greasy chain or excessive chain noise are practical signs that cleaning and lubrication may be needed.
What You Need to Clean and Lubricate a Bike Chain
Before you start, here’s exactly how to clean and lubricate your bike chain with the right supplies on hand. You don’t need a professional workshop to perform basic chain maintenance — gather the following items before you begin:
- Bike-specific chain degreaser
- Clean microfiber or shop rags
- Chain cleaning brush or old toothbrush
- Small drivetrain brush
- Bucket of water if needed
- Bike-specific chain lubricant
- Gloves
- Bike repair stand, if available
A repair stand makes the job much easier because you can rotate the pedals backward while keeping both hands available for cleaning. However, you can still perform basic maintenance without one.
Avoid using a high-pressure hose directly on bearings and other sensitive components. REI’s bike-cleaning guide specifically warns that high-pressure water can damage bearing systems on a bicycle.
Protect Your Bike Before Cleaning
Before applying degreaser or lubricant, think about where the liquid can go.
If your bike has disc brakes, keep degreaser and chain lubricant away from the brake rotors and pads. Contaminating a disc brake rotor with oil can seriously reduce braking performance.
If necessary, cover the rotor with a clean cloth or cardboard while working around the drivetrain. Never deliberately spray lubricant around the entire drivetrain.
Step 1: Remove Loose Dirt and Grime
Start with a dry chain. Use a clean brush or rag to remove loose dirt, sand and dried mud from the chain, cassette and chainrings.
Rotate the pedals backward slowly while holding the rag around the chain. This allows you to clean multiple sections without forcing the chain through the drivetrain too quickly.
If the chain is extremely dirty, don’t worry about getting every bit of grime off at this stage. The goal is simply to remove the loose contamination before applying degreaser.
Step 2: Degrease the Bike Chain
Apply a bicycle-specific chain degreaser while slowly rotating the pedals backward. Make sure the cleaner reaches the chain evenly.
Avoid flooding the entire bicycle with degreaser. Concentrate on the drivetrain and follow the instructions provided by the degreaser manufacturer.
For routine cleaning, a dedicated drivetrain cleaner or chain-cleaning device can make the process faster. For a very dirty chain, repeated cleaning may be necessary.
Step 3: Scrub the Chain Thoroughly
Use a chain brush, stiff detailing brush or old toothbrush to work the degreaser into the chain.
Pay particular attention to the areas around the rollers and between the side plates. Rotate the pedals backward as you scrub so that you can reach the entire chain.
Don’t forget the rest of the drivetrain. Dirt around the cassette, chainrings and derailleur pulleys can quickly find its way back onto a freshly cleaned chain.
Step 4: Wipe or Rinse the Chain
Once the degreaser has had enough time to loosen the grime, wipe the chain thoroughly with a clean rag.
If the chain is heavily contaminated, you may need to repeat the degreasing process. The goal is to remove the black residue rather than simply spread it around the chain.
If you rinse the chain, use water carefully and avoid high-pressure spraying around bearings, hubs, bottom brackets and other sensitive areas.
Step 5: Dry the Chain Completely
Drying is one of the most important steps before lubrication.
Use a clean, dry microfiber cloth to remove as much moisture as possible. You can also use compressed air carefully if you have access to it.
Do not apply ordinary chain oil over a visibly wet chain unless the lubricant manufacturer specifically says it is designed for that application.
A clean and dry surface gives your fresh lubricant a much better starting point.
Step 6: Choose the Right Chain Lubricant
Not every chain lubricant is designed for the same riding conditions. The right choice depends heavily on where and when you ride.
Wet Chain Lube
Wet lubricants are designed to remain on the chain in wet conditions. They can be useful for rainy climates, winter riding and consistently wet roads.
The downside is that wet lube tends to attract more dirt and grit, so careful wiping is especially important.
Dry Chain Lube
Dry lubricants are generally better suited to dry and dusty conditions. They tend to attract less dirt than heavy wet lubricants, but they can wash away more easily when exposed to rain.
Wax-Based Lubricants
Wax-based lubricants have become increasingly popular among cyclists who prioritize drivetrain cleanliness and efficiency. Manufacturer data for popular wax-based options like Silca’s Super Secret chain lube claims wax can reduce chain and cassette wear by as much as 90% compared to traditional wet or dry lubes when applied correctly.
However, wax systems often require more preparation than simply applying a traditional drip lubricant. For everyday riders, a quality drip wax can be a convenient middle ground. If you want to go all-in on wax, see our full step-by-step guide on how to wax a bike chain for the complete stripping, waxing and re-lubing process.
Step 7: Apply Chain Lubricant Correctly
This is where many cyclists make a mistake. You don’t need to soak the outside of the chain in lubricant.
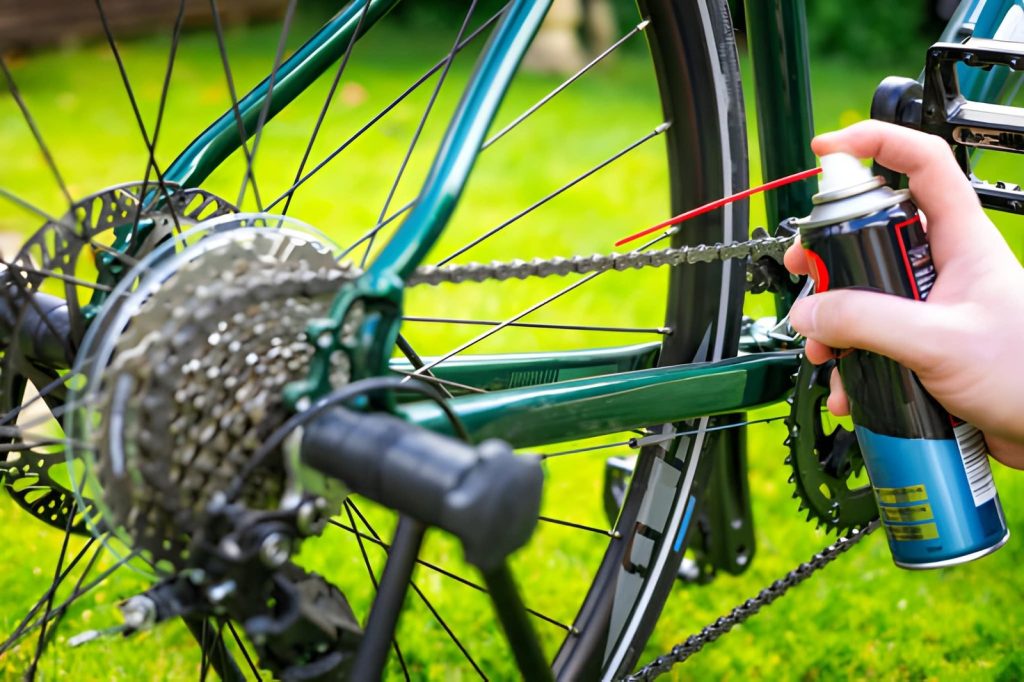
Instead, apply a small amount of bicycle-specific lubricant directly to the chain’s moving areas while slowly rotating the pedals backward.
- Place the lubricant bottle over the lower section of the chain.
- Rotate the pedals backward slowly.
- Apply approximately one small drop to each roller or link.
- Continue until you have covered the complete chain.
- Allow the lubricant time to penetrate according to the product instructions.
Applying lubricant carefully also gives you an opportunity to inspect the chain. A slow application can help you notice tight links, damaged plates or unusual movement.
BikeRadar recommends drip-on lubricant rather than spraying lubricant broadly over the drivetrain, partly because controlled application reduces the risk of contaminating disc brakes.
Step 8: Wipe Off Excess Lubricant
This step is easy to skip, but it is extremely important.
After giving the lubricant enough time to penetrate, hold a clean rag around the chain and slowly rotate the pedals backward.
Your goal is to remove lubricant sitting on the outside of the chain while leaving enough lubricant inside the moving components.
Too much lubricant on the outside of the chain acts like a magnet for dust and road grit. REI also recommends wiping away excess lubricant because accumulated lubricant can attract abrasive particles.
Wet Lube vs Dry Lube: Which One Should You Use?
Part of learning how to clean and lubricate your bike chain is picking the right product for your climate. Here’s a quick side-by-side comparison:
| Lubricant | Best Conditions | Main Advantage | Main Drawback |
|---|---|---|---|
| Wet Lube | Rain and wet roads | Stays on the chain | Attracts more dirt |
| Dry Lube | Dry and dusty conditions | Cleaner drivetrain | Washes away more easily |
| Wax Lube | Performance and clean conditions | Low contamination | More preparation required |
What About Wax-Based Chain Lubricants?
Wax-based lubrication deserves special attention because it works differently from traditional oil-based chain lubes.
A properly prepared waxed chain can remain relatively clean because the lubricant does not behave like a sticky oil film that continually attracts road grime.
For riders who want maximum drivetrain efficiency and don’t mind spending more time preparing the chain, wax can be an excellent option. However, traditional wet or dry drip lubes remain easier for many casual and commuter cyclists.
If you decide to change from one lubricant type to another, clean the chain thoroughly first. Mixing old contaminated lubricant with a new formulation can reduce the benefits of the new lubricant.
How Often Should You Clean and Lube Your Bike Chain?
There isn’t one mileage number that works for every cyclist. Chain maintenance depends on your riding conditions, mileage, weather and lubricant.
A useful rule is to inspect your chain regularly and lubricate it whenever it becomes noticeably dry, noisy or contaminated.
- Dry road riding: inspect regularly and clean when dirt accumulates.
- Wet riding: clean and relubricate more frequently.
- Muddy mountain biking: clean the drivetrain after particularly dirty rides.
- Daily commuting: perform a quick inspection several times per week.
- After a very wet ride: dry and lubricate the chain as soon as practical.
If your chain becomes noisy, feels dry or visibly collects dirt, don’t wait for a scheduled maintenance day. That’s usually a good indication that it needs attention.
Common Bike Chain Lubrication Mistakes
Even riders who already know how to clean and lubricate your bike chain in theory can fall into a few common traps. Watch out for these:
1. Lubricating a Dirty Chain
Adding fresh lubricant to a heavily contaminated chain can trap additional dirt and create an abrasive mixture. Clean the chain whenever it has accumulated significant grime.
2. Using Too Much Lubricant
A dripping-wet chain is not necessarily a well-lubricated chain. Excess lubricant on the outside attracts dirt and can quickly turn the drivetrain black.
3. Spraying Lubricant Everywhere
Spray lubricants can be difficult to control. A drip bottle makes it easier to target the chain and reduces the chance of contaminating brake rotors.
4. Forgetting to Dry the Chain
Applying lubricant to a wet chain can reduce the effectiveness of some lubricants. Dry the chain thoroughly before applying your chosen product.
5. Ignoring the Cassette and Chainrings
A clean chain running through a filthy drivetrain won’t stay clean for long. Brush and wipe the cassette, chainrings and derailleur pulleys as necessary.
6. Never Checking Chain Wear
Cleaning cannot repair a worn chain. If the chain has excessive wear, replacing it before it damages the cassette and chainrings may save you money.
Don’t Forget to Check Chain Wear
Chain cleaning and lubrication are only part of drivetrain maintenance. Chains gradually wear as the pins and rollers move under load.
A worn chain can eventually contribute to poor shifting and accelerated wear on the cassette and chainrings. That’s why checking chain wear periodically is just as important as keeping the chain clean.
A simple chain wear checker is inexpensive and makes it easy to determine whether your chain is approaching its replacement point.
Frequently Asked Questions
What is the correct way to clean and lubricate a bike chain?
The correct way to clean and lubricate your bike chain is to remove loose dirt, degrease it, scrub it, rinse or wipe it, dry it completely, apply lubricant one drop at a time, then wipe away the excess before riding.
Can I use WD-40 as bike chain lubricant?
A general-purpose penetrating product should not automatically be treated as a dedicated bicycle chain lubricant. For regular chain maintenance, use a lubricant specifically designed for bicycle chains and the conditions you ride in.
How much chain lube should I use?
Use a small amount applied carefully to the moving parts of the chain. The exact amount depends on the lubricant, but you should not leave the outside of the chain soaking wet.
Should I lubricate the chain after every ride?
Not necessarily. Inspect the chain and consider your riding conditions. Wet rides, dusty roads and high mileage can require more frequent maintenance than short rides in clean, dry conditions.
Can I wash my bike with a pressure washer?
It is better to avoid directing high-pressure water at bearings and other sensitive components. Low-pressure water and controlled cleaning are safer choices for routine bicycle maintenance.
Is wet or dry chain lube better?
Neither is universally better. Wet lube is generally more appropriate for wet conditions, while dry lube is better suited to dry and dusty environments. Choose based on where you actually ride.
What happens if I use too much chain lubricant?
Excess lubricant can attract dirt and grit, leaving the drivetrain dirty and potentially increasing abrasive contamination. Always wipe away excess lubricant before riding.
How long should I wait after lubricating my bike chain?
Follow the instructions on the lubricant you are using. Some products can be used relatively soon after application, while others perform better after being allowed to penetrate or dry for a longer period.
Final Verdict
Learning how to clean and lubricate your bike chain properly is one of the easiest ways to improve your bicycle maintenance routine.
The process is simple: remove loose dirt, degrease the chain, scrub away contamination, wipe or rinse carefully, dry everything thoroughly, apply the right lubricant and remove the excess.
The most important lesson is that more lubricant is not better. The goal is to put the lubricant where the chain needs it and keep unnecessary oil or wax from coating the outside of the drivetrain.
With regular cleaning and the right lubricant for your riding conditions, you can keep your drivetrain quieter, smoother and better protected from unnecessary wear. Now that you know how to clean and lubricate your bike chain, the rest of your maintenance routine gets a lot easier too.
Quick Chain Maintenance Checklist
- ✔ Inspect the chain regularly
- ✔ Remove loose dirt before deep cleaning
- ✔ Use a bicycle-specific degreaser
- ✔ Scrub the chain thoroughly
- ✔ Dry the chain completely
- ✔ Choose lubricant according to riding conditions
- ✔ Apply small amounts to the chain’s moving surfaces
- ✔ Wipe off excess lubricant
- ✔ Check chain wear periodically
📚 More from BikeRushHub
For more bicycle maintenance guides, keep exploring BikeRushHub.com and build a maintenance routine that keeps your bike ready for every ride.
Disclaimer: This article is for general bicycle maintenance information. Always follow the instructions supplied with your bicycle components and cleaning or lubrication products. If you’re unsure about a repair or component condition, consult a qualified bicycle mechanic.
